
Introduction to Arcjet
Hey, everyone in today’s blog we’ll be talking about Arcjet. A security tool that helps developers protect their apps against bot attacks, data redaction , helps implementing rate limiting, email validation in our apps and much more. It’s a, “developer-first approach to security”.
In the below sections, we’ll be integrating Arcjet in our node-express application and will be implementing a simple rate limiting into our application.
Let’s start 🚀🚀
Initializing the Project
npm init -yThis will initialize your simple node project , now let’s required install the dependencies.
Installing the Dependencies
npm i express cors nodemon dotenvAlso create a index.js and .env file in your root directory.
Now, in your .env file add your API KEYS for the Arcjet project.
Your .env should be somewhat as shown below
ARCJET_KEY =
ARCJET_ENV = development
PORT =
Writing the Code
We’ll start by importing the required dependencies and the modules in our index.js file.
import express from "express";
import cors from "cors";
import axios from "axios";
import dotenv from "dotenv";
dotenv.config();
Your initial project is somewhat will look like as below.
import express from "express";
import cors from "cors";
import axios from "axios";
import dotenv from "dotenv";
dotenv.config();

const PORT = process.env.PORT;
const app = express();
app.use(cors());
app.use(express.json());

app.get("/", (req, res) => {});

app.listen(PORT, () => {
    console.log(`Server running on http://localhost:${PORT}`);
});
Instantiating Arcjet
Now we’ll be creating Arcjet instance to implement rate limiting. So we will import arcjet along with tockenBucket about which I’ll talk further in this blog.
import arcjet, { tokenBucket } from "@arcjet/node";// Initialising Arcjet
const aj = arcjet({
key: process.env.ARCJET_KEY,
characteristics: ["ip.src"], // Track request by IP
rules: [
tokenBucket({
mode: "LIVE",
refillRate: 5, // Refill 5 tokens per interval
interval: 10, // Refill every 10 seconds
capacity: 10, // Bucket capacity of 10 tokens
}),
],
});Now we’ll implement a get route and will call a free API and will implement rate limit on that. Each and every term used above is explained at the last of the blog.
app.get("/", async (req, res) => {
    const decision = await aj.protect(req, { requested: 5 }); // deduct 5 tokens from the bucket
    console.log(decision);

    if (decision.isDenied()) {
        res.json({ message: decision.conclusion });
    } else {
        const response = await axios.get("https://catfact.ninja/fact");

        res.json({ message: response.data.fact });
    }
});
So finally the code finishes here 🥳.
Testing
We’ll use postman to test our application.
-
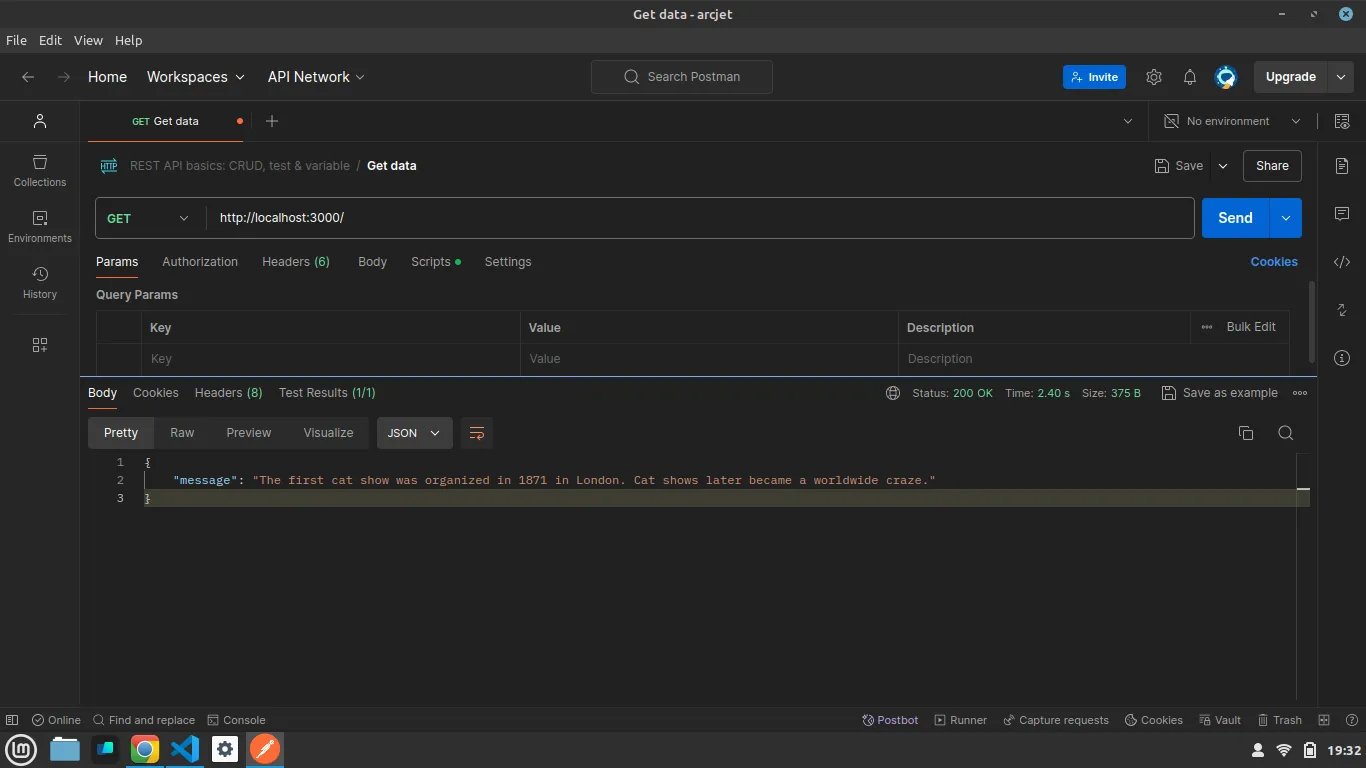
First request . It returns data fetched from the API
-
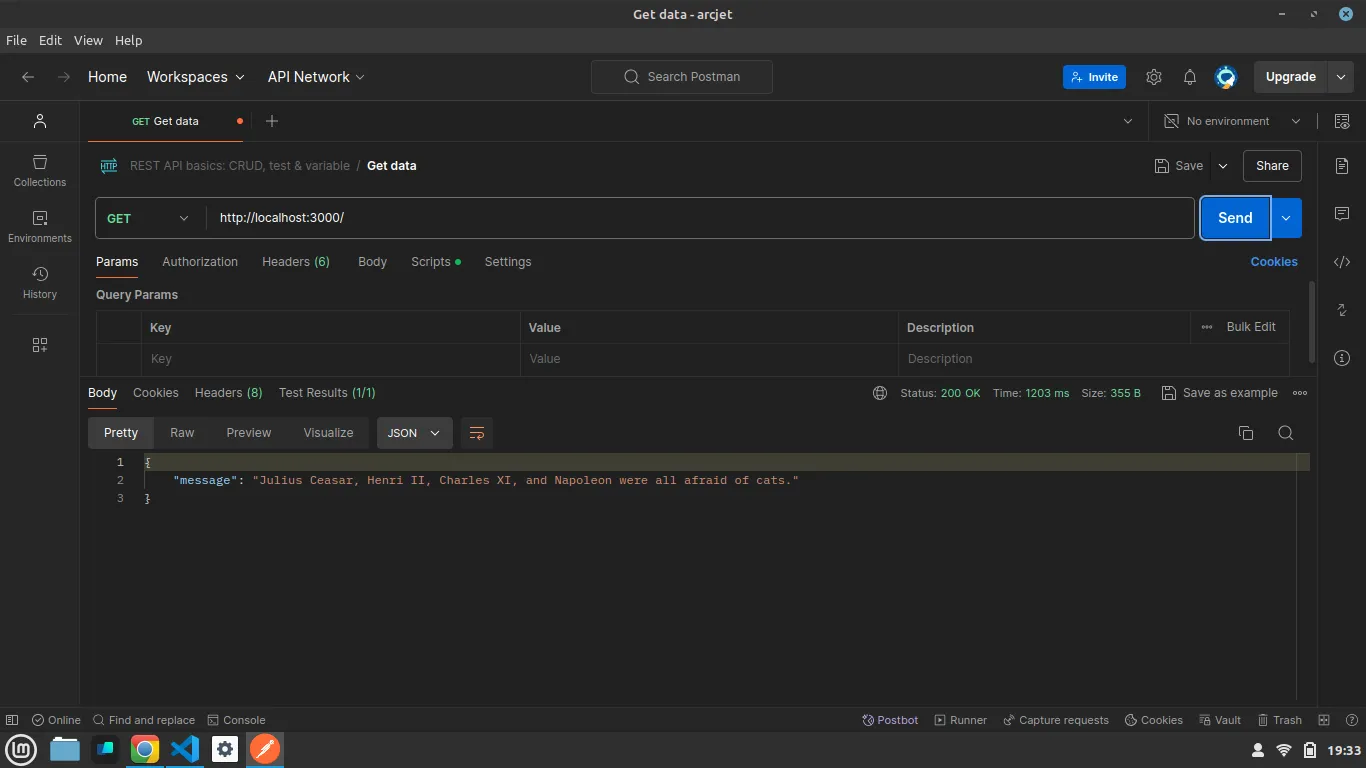
Second request. It again fetch us the data.
-
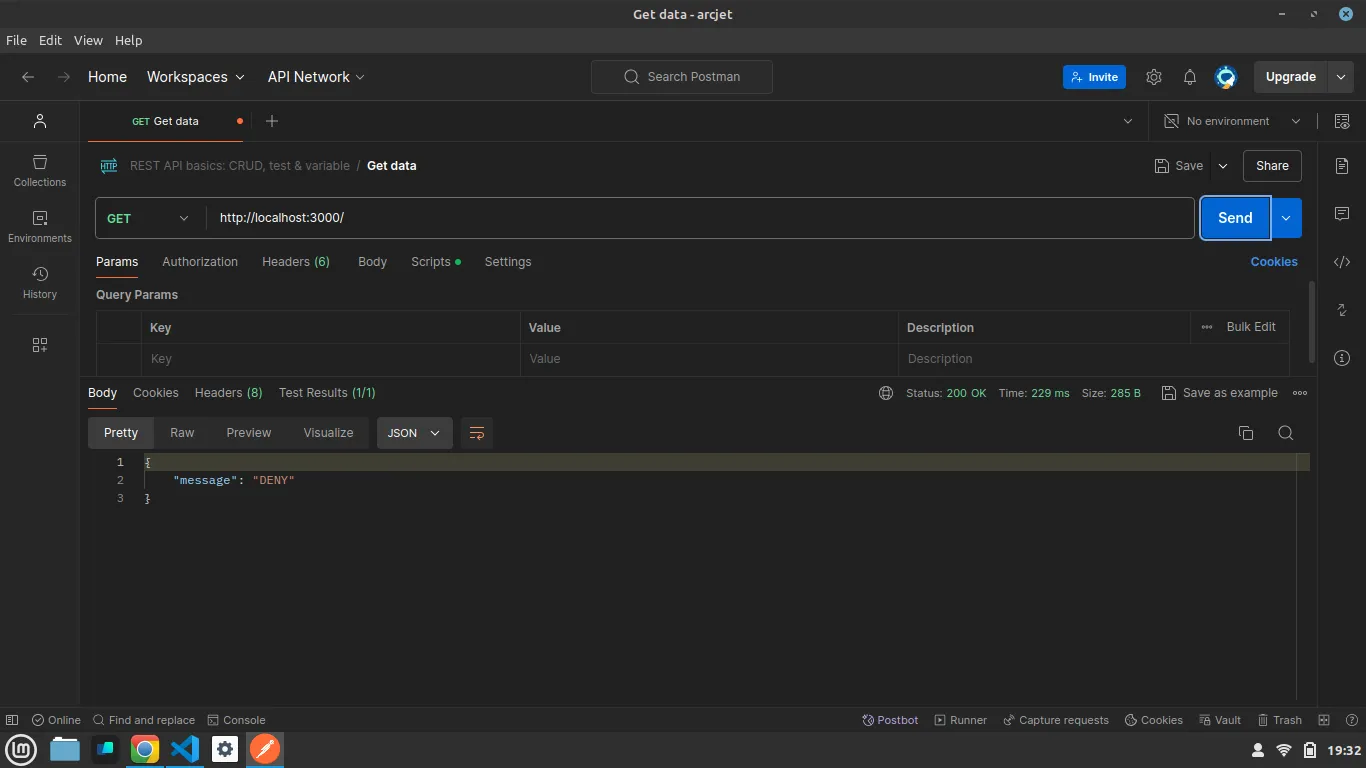
Third request. It denied to hit the endpoint.
Understanding the Terms
Understanding each term used while instantiating Arcjet.
const aj = arcjet({
    key: process.env.ARCJET_KEY,
    characteristics: ["ip.src"], // Track request by IP
    rules: [
        tokenBucket({
            mode: "LIVE",
            refillRate: 5, // Refill 5 tokens per interval
            interval: 10, // Refill every 10 seconds
            capacity: 10, // Bucket capacity of 10 tokens
        }),
    ],
});-
key: It’s your Arcjet
API_KEY. -
characterstics: It defines on what basis Arcjet will track the request of the user hitting the enpoints. Arcjet let developers use different types of characterstics. Read here: https://docs.arcjet.com/rate-limiting/quick-start
-
rules: They defines the protection we are using in our application. Check out this example to understand various types of rules: https://docs.arcjet.com/get-started?f=node-js-express
-
tockenBucket: It is a rate limiting algorithm. Arcjet provide with various different types of rate limiting algorithms such as
sliding windowetc. Read here: https://docs.arcjet.com/rate-limiting/algorithms-
refillRate: Rate at which the tokens will be refilled in the bucket.
-
interval: It defines the time after the bucket will start refilling.
-
capacity: Maximum capacity of the bucket or the maximum tokens it can carry.
-
-
requested: It is the number of tokens deducted from the bucket after each request.
Conclusion
In this blog we implemented a simple node-express application with rate limiting using Arcjet.
If you found this blog helpful, share it with others who might benefit.
Want to know more about Arcjet?
Check this out: https://arcjet.com/
Thanks for reading :)